

Offshore in Florida, ballyhoo is king. Every angler chasing mahi knows this. But knowing they work and knowing how to make them work are two different things. The ability to properly rig ballyhoo for mahi is a core skill that separates consistently successful crews from those just burning fuel. A poorly rigged bait that spins or washes out is worse than an empty hook because it will not get eaten. It is a wasted spot in your spread.
This is not a chore to be rushed at the dock. It is a fundamental technique, a process that ensures your baits swim naturally and can withstand the speed and chaos of trolling. Getting this right is the foundation of productive mahi mahi fishing. A perfect bait presentation is your best argument for convincing a color-lit bull to leave the weed line and attack.
This guide gives you the complete process, from thawing your baits correctly to making sure they swim perfectly behind the boat. We will cover the essential naked rig, the attention-grabbing skirted rig, and how to troubleshoot baits that are not performing. Mastering this skill connects your preparation directly to the visceral thrill of a screaming drag and a big mahi crashing a bait you rigged yourself. It is about control, precision, and putting the odds squarely in your favor.
Why Mastering How to Rig Ballyhoo Is a Game-Changer
Offshore in Florida, ballyhoo is king. Every angler chasing mahi knows this. But knowing they work and knowing how to make them work are two different things. The ability to properly rig ballyhoo for mahi is a core skill that separates consistently successful crews from those just burning fuel. A poorly rigged bait that spins or washes out is worse than an empty hook because it will not get eaten. It is a wasted spot in your spread.
This is not a chore to be rushed at the dock. It is a fundamental technique, a process that ensures your baits swim naturally and can withstand the speed and chaos of trolling. Getting this right is the foundation of productive mahi mahi fishing. A perfect bait presentation is your best argument for convincing a color-lit bull to leave the weed line and attack.
This guide gives you the complete process, from thawing your baits correctly to making sure they swim perfectly behind the boat. We will cover the essential naked rig, the attention-grabbing skirted rig, and how to troubleshoot baits that are not performing. Mastering this skill connects your preparation directly to the visceral thrill of a screaming drag and a big mahi crashing a bait you rigged yourself. It is about control, precision, and putting the odds squarely in your favor.
Foundational Prep for a Perfect Swimming Ballyhoo
The process of rigging a perfect ballyhoo begins long before you touch a hook or wire. It starts with bait quality and preparation. Skipping these steps is the fastest way to create baits that wash out, spin, or fall apart after just a few minutes in the spread. A well-prepped ballyhoo is tough, flexible, and ready to swim like it is alive.
Thawing and Toughening Your Baits
You cannot turn a bad bait into a good one. Start with the best quality, vacuum-sealed ballyhoo you can find. Look for clear eyes and intact fins, signs that they were handled properly from the start. The thawing process is your first opportunity to either set yourself up for success or failure. Never thaw ballyhoo in fresh water. It is a cardinal sin that makes the baits soft, mushy, and pale. They will wash out before a mahi even sees them.
The correct method is to create a saltwater brine. In a small cooler, mix a generous amount of kosher salt and a sprinkle of baking soda into a saltwater slurry. The kosher salt is key because its coarse grains draw moisture out of the ballyhoo’s skin, making it significantly tougher and more durable. The baking soda helps preserve the bait’s color and shine. Place your frozen baits in this brine and let them thaw slowly. This not only thaws them but also firms up the flesh, ensuring they can handle the stress of trolling and strikes.
Prepping the Ballyhoo for Rigging
Once your baits are thawed and toughened, it is time for the physical prep work. Each of these steps is designed to eliminate a potential point of failure and ensure a natural swimming action. Follow them in order for every bait you rig.
- Empty the gut cavity. Hold the ballyhoo and use your thumb to apply firm pressure just in front of the anal vent. Slide your thumb forward towards the gills. You will see the stomach contents exit the mouth. This is critical. An empty gut cavity prevents the bait from filling with water and spinning or blowing out at trolling speed.
- Remove the eyes. The eyes create drag and are a primary cause of a ballyhoo spinning erratically. Use a small dowel, a de-boner tool, or even the end of your rigging wire to push them out completely. You want clean, empty sockets.
- Break the spine. This is what gives the ballyhoo its fluid, lifelike swimming motion. Pinch the bait firmly behind the head and run your thumb down the backbone, feeling for a series of small “pops.” You are breaking the vertebrae to make the bait limp and flexible. A properly broken-in ballyhoo should hang limply over your finger.
- Trim the pectoral fins. The small pectoral fins just behind the gill plates act like tiny rudders. If left on, they can cause the bait to plane to one side or roll. Use a pair of small scissors or clippers to trim them completely flush with the body.
With these steps completed, your ballyhoo is now a blank canvas, ready to be transformed into one of the most effective mahi trolling baits in your arsenal.
Essential Rigging Tools and Terminal Tackle
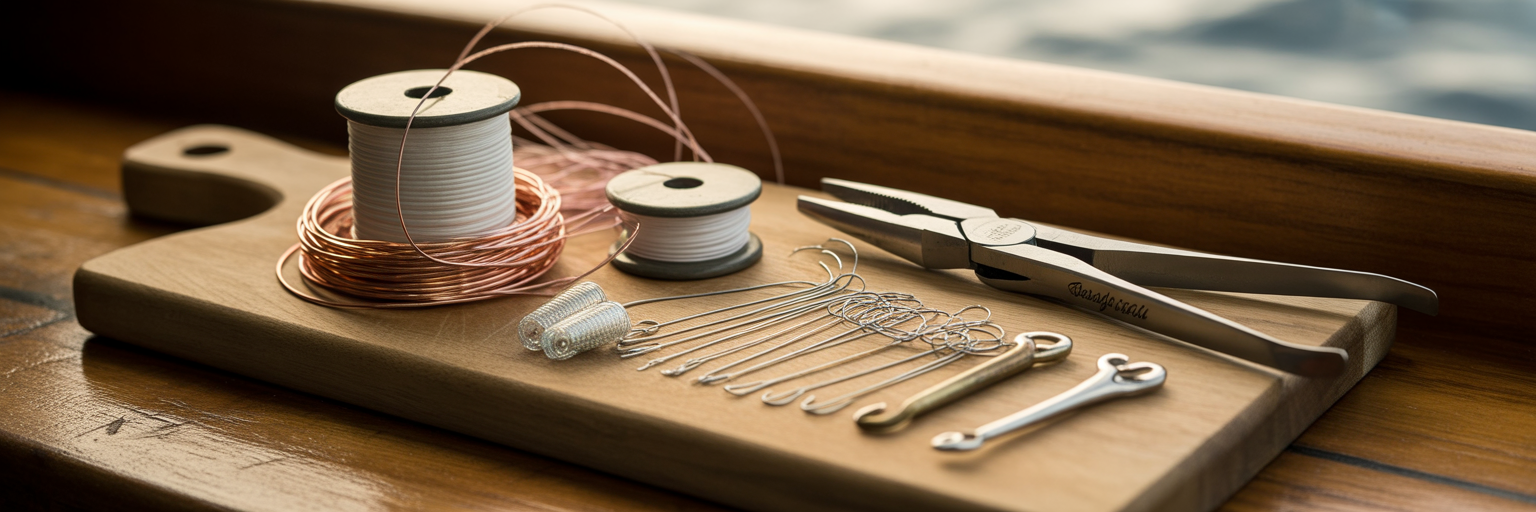
Having the right components organized and ready is just as important as the prep itself. Fumbling for the right size hook or the correct wire while you are trying to get baits in the water is inefficient. A well-stocked and organized rigging kit is the mark of a serious offshore angler. Here is what you need to build your baits correctly.
The Non-Negotiable Rigging Kit
Your rigging station should have a dedicated set of tools. These are not optional they are essential for building durable and effective rigs.
- Rigging Wire: This is what holds everything together. The two main choices are copper and monel. Soft copper wire is easier to wrap and is great for beginners. Monel is stiffer, more corrosion-resistant, and creates a more durable rig once you master working with it.
- J-Hooks: A 7/0 or 8/0 J-hook is the standard for medium to large ballyhoo. Ensure they are sharp right out of the package.
- Leader Material: 60 to 100-pound monofilament or fluorocarbon is the typical range for mahi leaders. Monofilament is more forgiving and has more stretch, while fluorocarbon is less visible in the water.
- Crimps and Crimpers: For connecting your hook to the leader, properly sized crimps and a quality hand-crimper are non-negotiable for a secure connection.
Matching Hooks and Leaders to Your Bait
Hook placement is not a guess. The rule of thumb is that the point of the hook should exit the ballyhoo’s belly right between the sockets where you trimmed the pectoral fins. If the hook is too far forward, it kills the bait’s natural wobble. If it is too far back, you risk poor hookup ratios as mahi often strike the head of the bait. Take a moment to measure the hook against the bait before you start rigging to ensure a perfect fit.
Your leader length should typically be around six feet. This provides enough distance from any terminal tackle to avoid spooking fish while remaining manageable for landing a fish boatside.
Components for Skirted Rigs
When you decide to build a skirted ballyhoo rig, you will need a few extra components. These additions are all about increasing visibility and commotion.
- Chin Weights: A small lead weight (1/4 to 1/2 ounce) is placed under the ballyhoo’s chin. Its purpose is to keep the bait running true and prevent it from skipping out of the water at faster trolling speeds.
- Lure Heads and Skirts: These slide onto the leader before the hook. Small chugger heads create a popping and smoking action that draws attention. Classic lure styles like a Sea Witch or Ilander provide a streamlined profile with pulsating color. The lure head also serves to protect the ballyhoo’s face, extending the life of the bait.
The Classic Pin Rig for Naked Ballyhoo
This is the foundation of how to rig ballyhoo. The naked pin rig presents the bait in its most natural form, making it deadly in clear water or when mahi are finicky. Mastering this technique ensures your bait swims with a subtle, lifelike wobble that is irresistible. Each step is crucial for a bait that tracks straight and holds up at trolling speed.
First, cut a six-foot section of leader and crimp your J-hook to one end. Then, cut an 8 to 10-inch piece of rigging wire. You are now ready to assemble the rig.
- Inserting the Hook: Gently open one of the ballyhoo’s gill plates. Pass the hook point in through the opening and guide it down through the bait’s throat, exiting the belly. The key here is to keep the hook perfectly centered. The hook should exit right between the pectoral fin sockets you trimmed earlier. If it is off to one side, the bait will roll.
- Securing the Head: This is where the wire comes in. Push the rigging wire through the center of the ballyhoo’s eye sockets, leaving equal lengths of wire on both sides. Bring both ends of the wire down and make two or three tight wraps around the shank of the hook. Now, take the tag end of the wire that is on the same side as the hook point and push it up through the ballyhoo’s chin, just behind the hard part of the lower jaw. This creates the “pin” that gives the rig its name.
- Wrapping the Beak: This is the most critical step for durability. Pull the pin tight so the hook is snug against the bait’s head. Now, take the other tag end of the wire and begin making tight, neat wraps around the ballyhoo’s beak and the pin wire. Wrap down the beak about half an inch, then wrap back up towards the head. These wraps must be tight and close together. This is what locks the jaw shut and prevents the bait from washing out.
- Finishing the Rig: Once you have wrapped back up to the head, make a few final wraps around the base of the pin to secure everything. Use your wire cutters or pliers to break the ballyhoo’s beak off just past your last wrap. This creates a clean, strong finish that will not catch weeds.
Your finished naked ballyhoo should be straight and secure. The hook should be centered, and the head should be locked tightly to the hook. As publications like Salt Water Sportsman often show, a secure head wrap is the difference between a bait that lasts for hours and one that falls apart on the first wave. This rig is now ready to be deployed and swim with a subtle action that mimics a natural baitfish.
Rigging Skirted Ballyhoo for Aggressive Strikes
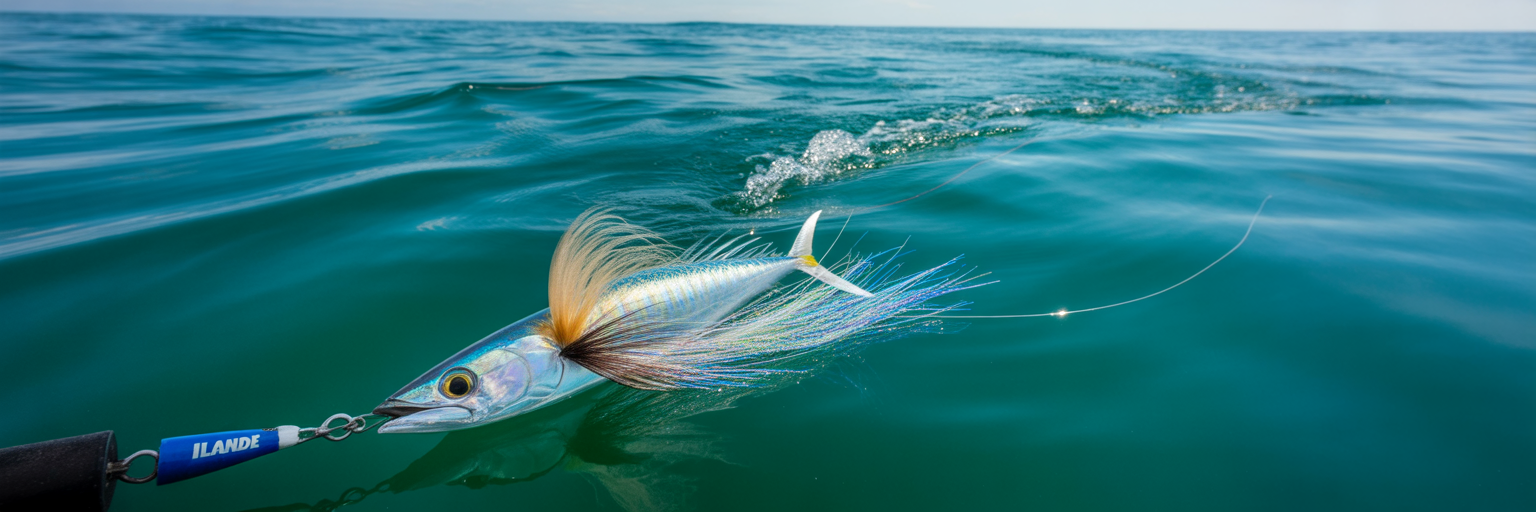
While a naked ballyhoo is a finesse presentation, the skirted ballyhoo rig is all about creating a commotion and triggering an aggressive reaction strike. Adding a skirt or lure head allows you to troll faster, cover more water, and give the mahi a larger, more visible target to attack. It also adds a layer of protection to the ballyhoo’s head, extending its life in the water.
Why and When to Add a Skirt
You add a skirt when you want to turn up the volume on your presentation. This is the go-to approach in rougher water, when trolling faster between 6 and 8.5 knots, or when you need to draw fish in from a distance. The added color, flash, and water disturbance from a lure head can be the difference-maker, especially when fish are feeding aggressively on larger baits. The skirt acts as an attractor, and the ballyhoo behind it serves as the irresistible offering.
Rigging with a Lure Head
The process for rigging a skirted ballyhoo is a modification of the classic pin rig. The key difference is the order of assembly. Before you crimp the hook onto your leader, you must first slide on your lure head and, if you are using one, your chin weight. Once those are on the leader, you can crimp the hook in place.
From there, the rigging process is nearly identical. You insert the hook through the gills and out the belly. You run the wire through the eye sockets. However, before you wrap the wire around the hook shank, you slide the chin weight into position under the ballyhoo’s throat. Then, you complete the wire wraps and form the pin. The final step is to slide the lure head down the leader until it fits snugly over the ballyhoo’s face. A good fit is crucial; you want a seamless transition from the lure to the bait to prevent unnatural movement.
Skirt Colors and Head Shapes
The choices in skirts and lure heads are endless, but a few combinations are proven producers for Florida mahi fishing. Having a selection of these allows you to adapt to the conditions of the day.
- Blue and White: The universal classic. It mimics flying fish and works exceptionally well on bright, sunny days.
- Pink and White: Another excellent choice for bright conditions, offering a slightly different profile that can be very effective.
- Black and Purple: This is your go-to combination for overcast days or low-light conditions at dawn and dusk. It creates a strong silhouette that fish can easily track.
- Green and Yellow: This color scheme is a perfect imitation of a small mahi, and it can trigger cannibalistic strikes from larger bulls.
The shape of the lure head also matters. Chugger or popper-style heads have a concave face that catches water, creating a bubble trail and surface commotion. Jet heads have holes drilled through them that create a smoke-like bubble trail. Both are designed to attract attention and should be placed strategically in your spread to maximize their effect.
Advanced Rigs: The O-Ring and Floss Method
Once you have mastered the pin rig, you can explore more specialized techniques. These advanced rigs offer distinct advantages in specific situations, whether you need lightning-fast bait changes during a hot bite or the ultimate stealth presentation for wary fish. They are valuable tools for the angler looking to refine their approach.
The O-Ring Rig for Speed and Efficiency
The primary benefit of the O-ring rig is speed. When a school of mahi is fired up and you are getting multiple knockdowns, you do not want to waste time re-rigging with wire. This method allows you to swap out a washed-out or damaged bait in seconds. It is most commonly used with a skirted ballyhoo and a chin weight.
To build it, you rig the hook and chin weight onto the leader as usual. Then, instead of using wire, you take a small, durable rubber O-ring. Place the hook in the ballyhoo as you normally would. Then, stretch the O-ring over the ballyhoo’s head and beak, seating it in the groove behind the hook eye. The tension of the O-ring holds the hook and chin weight securely in place. To change baits, simply cut the O-ring, slide on a new ballyhoo, and secure it with a fresh O-ring.
The Floss Rig for Ultimate Stealth
For those days when the water is gin-clear and the fish are highly pressured, the floss rig offers the most natural and hardware-free presentation possible. It replaces the visible rigging wire with waxed dental floss or specialized rigging floss, creating a clean look that can fool the most cautious mahi.
This technique requires a rigging needle. You thread the floss through the eye of the needle and pass it through the ballyhoo’s eye sockets. After positioning the hook, you use the floss to make a series of tight wraps and half-hitches around the hook and the bait’s head to secure everything. It is a slower, more meticulous process, but the resulting stealthy presentation is unmatched. It is the finesse play for tough conditions.
This table summarizes the primary applications for each rigging style. The choice depends on trolling speed, water conditions, and how aggressively the mahi are feeding.
| Rigging Method | Best Use Case | Rigging Speed | Presentation |
|---|---|---|---|
| Classic Pin Rig (Naked) | Clear water, wary fish, slower trolling speeds (4-6 knots) | Moderate | Natural and subtle |
| Skirted Pin/Chin Weight Rig | Attracting attention, faster trolling (6-8.5 knots), protecting the bait | Moderate | High visibility with added color and commotion |
| O-Ring Rig | Hot bites requiring rapid bait changes, primarily with skirts | Fastest | Secure and efficient, slightly less natural than floss |
| Floss Rig | Ultra-clear water, highly pressured or finicky fish | Slowest | Most natural and stealthy, no visible wire |
Setting Your Spread and Checking Bait Action
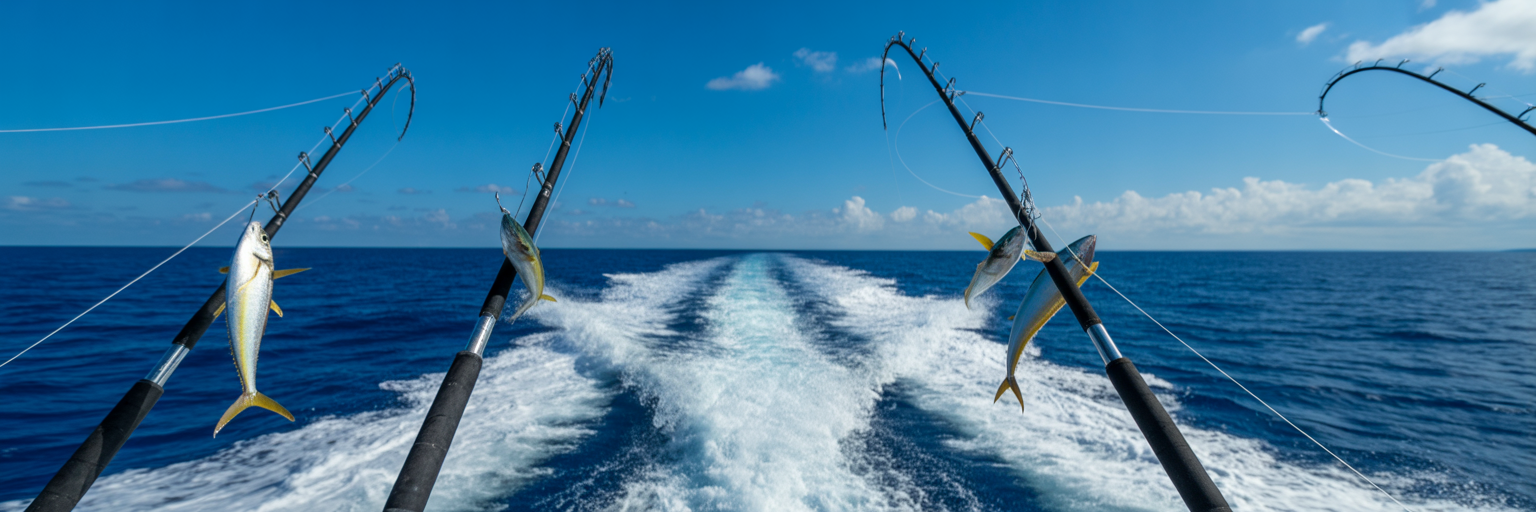
Rigging the perfect bait is only half the battle. Deploying it correctly and ensuring it performs as intended is what turns preparation into results. A well-tuned spread is a coordinated team of baits, each doing its job to attract fish.
The single most important step before sending a bait back is the swim test. After rigging, drop the ballyhoo boatside and pull it at your intended trolling speed. Watch it closely. It must swim straight with a gentle, rhythmic wobble. If it spins, rolls, or veers off to one side, it is a failure. Pull it in and fix it or replace it. A spinning bait will not get bit and can even create tangles in your spread.
A classic spread for Florida mahi fishing might look something like this:
- Short Riggers: Skirted ballyhoo with chugger heads. These are close to the boat in clean water, creating commotion and drawing fish into the spread.
- Long Riggers: Naked ballyhoo. Set further back, these offer a more subtle, natural presentation for fish that might be wary of the boat’s wake.
- Shotgun: A small skirted lure or another naked ballyhoo set way back in the center. This is often the bait that gets hit by the biggest, most cautious fish.
The key is constant vigilance. Your eyes should always be scanning the baits. A bad bait is a wasted opportunity. Every bait in your spread needs to be performing perfectly to maximize your chances of success.
Troubleshooting Common Rigging Failures
Even experienced anglers rig a dud now and then. The key is to quickly identify the problem, fix it, and get a working bait back in the water. Wasting time dragging a non-performing bait is a critical error. Here is a quick diagnostic checklist for the most common failures.
The number one problem is a spinning bait. If your ballyhoo is rolling like a propeller, pull it in immediately and check for these common causes:
- Eyes were not removed: This is the most frequent cause of spinning. The drag created by the eyes will cause the bait to roll.
- Uneven wire wraps: Bulky or lopsided wraps on the beak can create an uneven surface that catches water and induces a spin.
- Off-center hook placement: If the hook is not perfectly centered in the bait’s body, it will pull to one side and roll.
- Bent hook or leader kink: A slightly bent hook or a bad kink in the leader near the bait can also ruin the action.
Another common issue is a “washed out” bait. This is a ballyhoo that looks pale, has soft flesh, and shows no swimming action. It is usually caused by poor initial prep, thawing in freshwater, or damage from a non-hookup strike. There is no fixing a washed-out bait. The only solution is to replace it.
The golden rule is simple: When in doubt, swap it out. It is always better to spend two minutes to rig ballyhoo for mahi correctly than to drag a useless bait for an hour. To keep your baits in prime condition all day, store them in a cooler on top of ice, covered with a towel soaked in your saltwater brine. Proper preparation and a commitment to perfection are what put fish in the boat.