
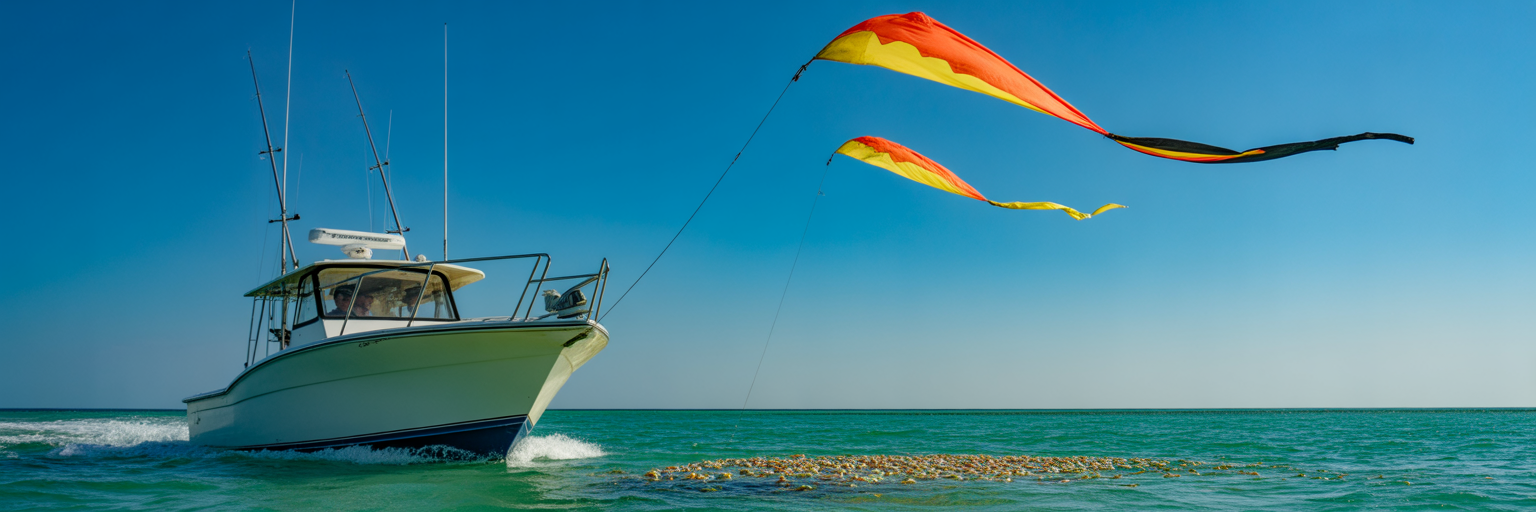
There are few sights in saltwater fishing that compare to a sailfish bill slashing through the surface, targeting a frantic goggle-eye dancing beneath a kite. This is the moment that defines the technique. Mastering kite bait rigging is not just another tactic; it is a commitment to presenting the most natural, irresistible offering possible. For crews engaged in Florida offshore fishing, it is the proven method for turning a good day into an unforgettable one by presenting baits in a way that pelagic predators are hardwired to attack.
The Advantage of Florida Kite Bait Rigging
The core principle of kite fishing is simple: create the perfect illusion of a panicked, isolated baitfish. By suspending the bait from a kite, you keep the leader, swivel, and all other terminal tackle completely out of the water. This creates a presentation so clean and natural that it fools even the most cautious gamefish, a significant advantage in Florida’s heavily pressured waters. While trolling or flat-lining have their place, nothing matches the stealth of a live bait swimming freely on the surface, its only connection to the boat invisible from below.
Imagine your boat on a slow drift, the wind holding your kite steady. Beneath it, a spread of live baits—goggle-eyes, blue runners, pilchards—are splashing in distress. This setup allows you to cover prime territory with surgical precision. You can position your baits along a distinct color change off Stuart, dance them along the edge of a weed line in the Keys, or suspend them over a wreck where predators are staging. The kite acts as an outrigger in the sky, letting you present multiple baits far from the boat’s shadow and engine noise, covering a wide swath of water.
This method is particularly deadly for surface-feeding pelagics. Sailfish, blackfin and yellowfin tuna, mahi-mahi, and kingfish are all visual hunters that are drawn to the commotion of a struggling baitfish. The frantic swimming action of a bridled bait sends out vibrations and visual cues that scream “easy meal.” The payoff is the visual strike. You see the fish approach, you see the take, and you feel the line come tight. It is an interactive and thrilling way to fish that puts you right in the middle of the action. For Florida anglers targeting these top-tier species, kite fishing is not just an option; it is the standard for consistent success.
Your Core Kite Fishing System Components
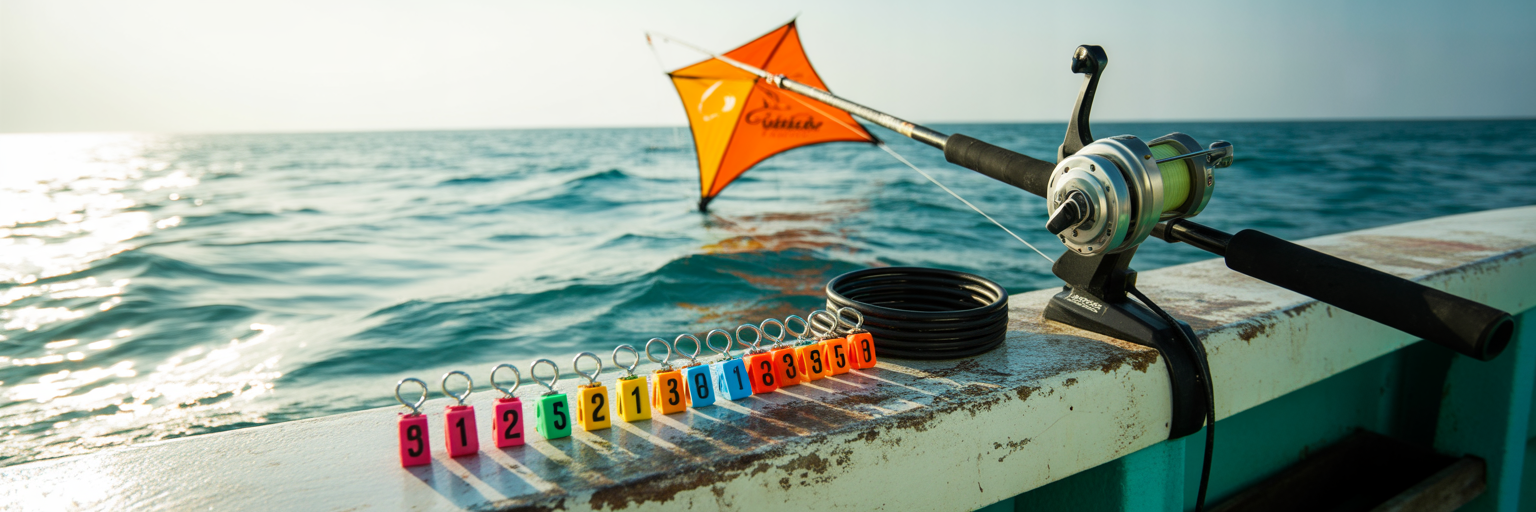
A successful kite fishing program is built on a system of specialized gear where every component has a critical job. Assembling the right setup from the start eliminates guesswork on the water and ensures your baits are presented perfectly. This is not the place to cut corners. Your system must be able to handle variable winds, manage multiple lines, and withstand the power of aggressive offshore predators. Let’s break down the essential pieces you need in your arsenal.
Choosing the Right Kite for the Wind
The kite itself is the engine of your operation, and you cannot have just one. Wind conditions in Florida can change quickly, so having a quiver of kites is essential. Brands like SFE make models designed for specific wind ranges. A light-wind kite has a large surface area and lightweight spars to stay airborne in 5 to 10 knots. Your all-purpose kite is the workhorse for moderate 10 to 20-knot winds. For those blustery winter days, a heavy-wind kite with a smaller profile and rigid frame is necessary to handle gusts over 20 knots without diving.
| Kite Type | Ideal Wind Speed (Knots) | Common Characteristics | Best Use Case |
|---|---|---|---|
| Light Wind / Ultra-Light | 5-10 knots | Large surface area, lightweight spars, often has holes for stability. | Calm days when getting a standard kite to fly is impossible. |
| All-Purpose / Medium | 10-20 knots | Standard size, durable construction, versatile for most Florida conditions. | Your everyday workhorse for offshore fishing from Palm Beach to the Keys. |
| Heavy Wind / High Wind | 20-30+ knots | Smaller surface area, heavy-duty spars, designed to handle strong gusts without diving. | Windy winter days when sailfish are tailing down-sea. |
The Ideal Rod and Reel Combination
Your kite rod and reel are for flying the kite, not fighting the fish. The standard is a short, stout rod around 3 to 4 feet long, which is easy to manage in the cockpit. This rod is paired with a reel spooled with high-visibility braided line. While manual reels work, electric reels like a Daiwa Tanacom have become the go-to for serious crews. They allow for precise, effortless adjustments to the kite’s height with the push of a button, which is critical when managing multiple lines and reacting to changing wind.
Kite Lines and Release Clip Systems
The main kite line, typically 80 to 100-pound high-vis braid, is the backbone of your deployment system. Marked at set intervals, this line tells you where to attach your kite fishing release clips. These clips are the connection point between your main kite line and your fishing lines. Quality clips with adjustable tension are crucial. You need enough tension to hold the fishing line securely but not so much that it fails to release when a fish strikes. Properly spaced clips allow you to fish baits at different distances from the boat—short, middle, and long—creating an organized and effective spread.
The Terminal Tackle Setup
The terminal rig that connects your fishing line to the bait is designed for stealth and control. Each part serves a specific function:
- The Float: A small cork or plastic float is positioned at the top of the leader. Its job is to keep the leader vertical in the water and ensure the swivel and connection point remain on the surface, out of sight from predators below.
- The Egg Sinker: A lead egg sinker, typically 1 to 3 ounces, is placed between the float and the swivel. This weight is essential for keeping the live bait from getting skipped across the surface by the wind. It anchors the bait in the water so it can swim naturally.
- The Swivel: A small, high-quality ball-bearing swivel connects your main fishing line to the leader. This prevents line twist as the bait swims, which would weaken your line and create an unnatural presentation.
- The Fluorocarbon Leader: A 6 to 12-foot section of 30 to 60-pound fluorocarbon leader is standard. Fluoro is nearly invisible underwater and provides abrasion resistance. The length keeps the bait at a distance from the surface commotion of the float and sinker.
Selecting and Prepping Your Live Baits
Your kite fishing success is directly tied to the quality of your bait. You can have the best gear and the perfect conditions, but a weak or dying bait will not get bit. The goal is to present a hardy, frantic bait that sends out the distress signals pelagic predators are tuned into. In Florida, the premier kite baits are goggle-eyes, blue runners, pilchards, and threadfin herring. These species are tough enough to handle being bridled and will swim hard for hours, creating the commotion needed to draw a strike.
Bait vitality is everything. This starts with a high-quality, well-circulated livewell. Overcrowding your well or having poor water flow will quickly stress and kill your baits. A dead bait is useless, and a sluggish one is not much better. You need baits that are kicking hard and full of energy. Before deploying a bait, inspect it. It should be vibrant, clear-eyed, and ready to swim for its life. If it looks weak, put it back and grab a healthier one.
Matching bait size to your target species is another key detail. Large, frisky goggle-eyes are prime offerings for sailfish and tuna, as their size and stamina make them an irresistible meal. Hard-kicking blue runners are also excellent for drawing aggressive strikes from big predators. For targeting mahi-mahi and kingfish, or when the bite is on smaller fish, scaling down to lively pilchards or threadfin herring is a smart move. The principles of keeping bait healthy and matching it to your target are fundamental to all successful angling in Florida, forming the core of effective live bait fishing tactics.
The Art of Bridling for a Natural Swim
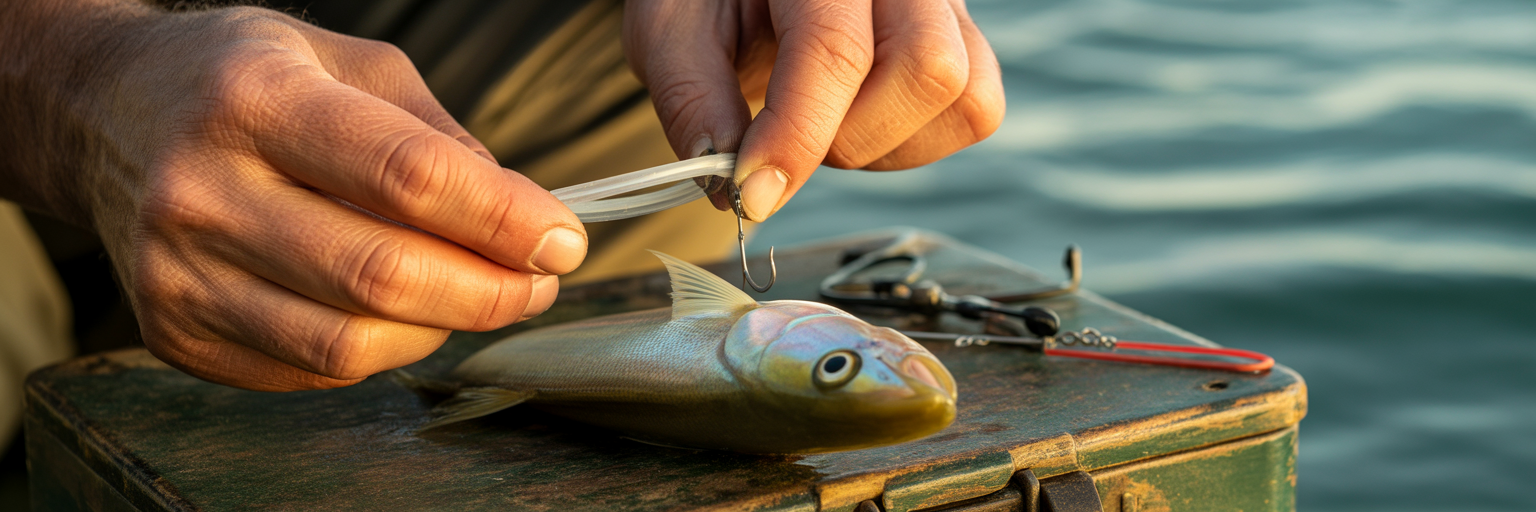
Bridling is the technique used to attach a hook to a live bait without impeding its ability to swim. A properly bridled bait will swim upright, look natural, and stay lively for an extended period. The hook should ride just above the bait’s back, perfectly positioned for a solid hookup when a predator strikes. While there are several methods, the traditional rubber band bridle is a time-tested standard that every offshore angler should master.
Here is a step-by-step guide to the traditional bridling method:
- Prepare Your Tools: You will need a rigging needle and a small, strong rubber band. Loop the rubber band onto the end of the rigging needle.
- Position the Needle: Hold the bait firmly. For most baitfish like blue runners or pilchards, you will pass the needle through the hard cartilage just forward of the dorsal fin. This spot is tough and holds the bridle securely without injuring the fish.
- Pass the Band Through: Push the needle through the bait. Pull one loop of the rubber band off the needle, leaving the other loop on the opposite side of the fish. Remove the needle.
- Secure the Hook: Take the loop you just pulled through and twist it several times to tighten it. Then, pass the other loop through the twisted one. Place the point of your circle hook through this final loop and pull it tight. The hook should now sit snugly on top of the bait’s back.
When you need to know how to bridle goggle eyes, the process is similar, but the placement is different. You should pass the needle through the top of the eye sockets, where there is a hard, bony ridge. This placement is secure and allows the goggle-eye to swim freely without the hook interfering with its movement. For anglers who want a visual reference, the step-by-step photography in guides like the one from BDOutdoors on rigging live bait can be an invaluable resource for mastering this technique.
In a hot bite, speed matters. Modern clip-based systems, like the popular ‘Gerry Rig,’ offer a much faster alternative. These systems use a special tool to attach a clip to the bait, which then snaps onto the hook. While not as stealthy as a traditional bridle, they allow you to re-bait in seconds. Regardless of the method you choose, the objective remains the same: a secure hook that allows the bait to perform with a natural, panicked action that triggers strikes.
Rigging Leaders and Weights for Control
The components between your fishing line and your bait are all about control and stealth. This is where you fine-tune your presentation to match the conditions and the temperament of the fish. Getting these details right separates the crews that get bites from those that just watch their baits swim.
Your leader material and size are the first consideration. The standard for most Florida kite fishing is 30 to 50-pound fluorocarbon. In crystal-clear water or when targeting exceptionally wary fish like sailfish, dropping down to a 30 or 40-pound leader can make a significant difference. For toothy predators like kingfish or wahoo, you may need to bump up to 60-pound or even add a short trace of wire. The leader should be about 6 to 12 feet long, providing enough distance between the bait and the surface components.
The egg sinker is your primary tool for controlling the bait’s depth. Its sole purpose is to keep the bait in the water, preventing the wind from skipping it across the surface. A 2-ounce sinker is a great starting point, but you must be ready to adjust. If the wind is light and the bait is dragging, go down to a 1-ounce. If it is blowing hard and your bait is flying, go up to a 3-ounce. The goal is to have the bait swimming just below the surface, not on it.
Just above the sinker sits a small float or cork. This simple component is one of the most important sailfish kite fishing tips you can get. The float’s job is to keep your leader hanging vertically in the water column and ensure the swivel and sinker stay on the surface. This keeps the hardware out of the fish’s line of sight, creating the stealthiest presentation possible. Without it, the weight could pull the swivel underwater, creating a visible and unnatural connection point that leader-shy fish will avoid.
Finally, a pro-tip for cockpit management: once your leader is rigged, wrap the excess leader around the butt of your rod and secure it with a small rubber band. This keeps the deck clean, prevents tangles with other lines, and allows for a smooth, controlled deployment when it is time to send the bait out.
Deploying and Managing Multiple Kite Baits
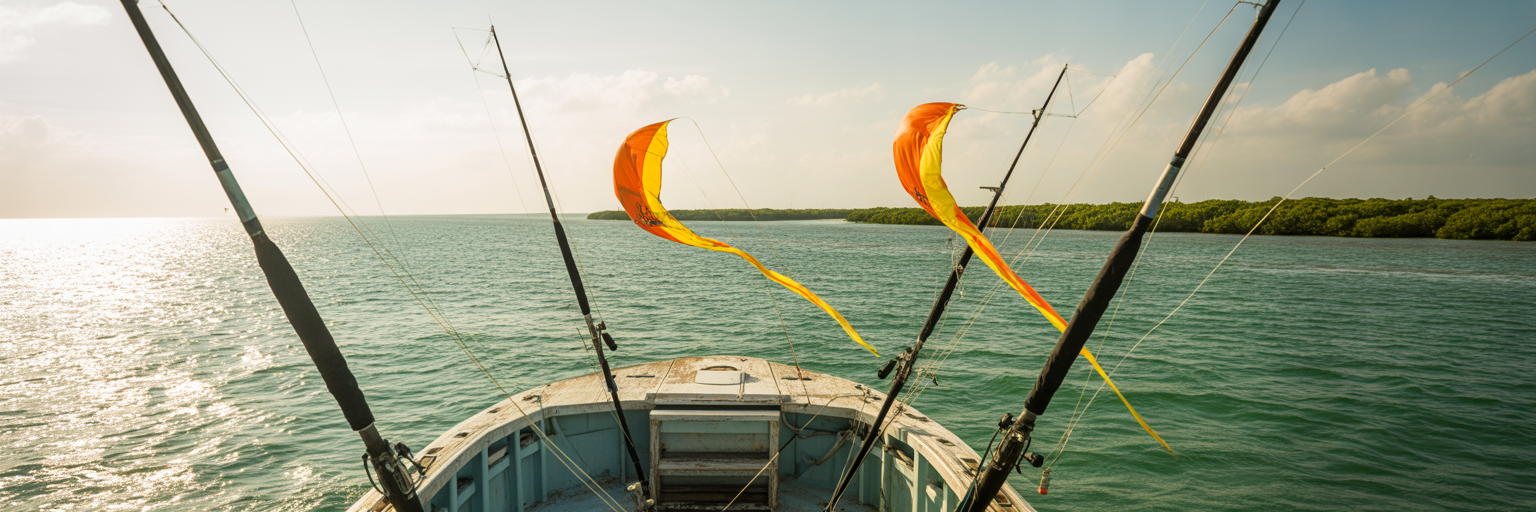
With your gear rigged and your baits ready, it is time for execution. Deploying and managing a spread of kite baits is a coordinated effort that requires communication and a clear process. A well-managed spread allows you to cover a massive amount of water and present offerings that look like a scattered school of panicked baitfish—a scenario that predators cannot resist.
The essence of multi-line kite fishing is creating an organized spread with baits at different distances. Here is the standard deployment sequence:
- Launch the Kite: Let out enough line to get the kite stable in the air, well above the water.
- Set the Short Bait: Attach your first fishing line to the release clip closest to the kite rod. Let out the kite line until the clip is in position, typically 75-100 feet out. This is your “short” bait.
- Set the Middle Bait: Attach your second fishing line to the next release clip up the kite line. Let out more kite line until this bait is positioned about 150 feet out, creating your “middle” bait.
- Set the Long Bait: Attach your third line to the farthest clip and send it out to the “long” position, often 200 feet or more from the boat.
For maximum coverage, many top crews fly two kites simultaneously. The trick is to make them fly away from each other, widening your spread. This is done by adding a small split-shot weight to the outer corner of each kite. The weight on the left kite’s left corner will make it track left, and the weight on the right kite’s right corner will make it track right. This can give you a spread of six baits covering hundreds of feet of water. As noted by experts in Salt Water Sportsman, managing the kite’s position relative to the boat is just as important as the bait itself, as it dictates the entire presentation.
This entire operation hinges on teamwork. The captain at the helm must maintain the perfect drift speed and angle to the wind, keeping the lines tight and the baits swimming in the strike zone. The anglers in the cockpit must watch the baits, manage the lines, and be ready to react instantly when a fish appears. Constant communication is key to keeping the spread fishing effectively and converting bites into hookups.
| Position | Distance from Boat | Typical Bait | Primary Target |
|---|---|---|---|
| Left Short | ~75 feet | Pilchard or Threadfin | Mahi, Blackfin Tuna |
| Left Middle | ~150 feet | Goggle-Eye | Sailfish, Wahoo |
| Left Long | ~225 feet | Blue Runner | Sailfish, Large Tuna |
| Right Short | ~75 feet | Pilchard or Threadfin | Mahi, Blackfin Tuna |
| Right Middle | ~150 feet | Goggle-Eye | Sailfish, Wahoo |
| Right Long | ~225 feet | Blue Runner | Sailfish, Large Tuna |
Troubleshooting Common Kite Fishing Problems
Even the most experienced crews run into issues on the water. The difference is that they know how to identify and solve them quickly. Being prepared for common problems will keep you fishing effectively and build your confidence in the technique. Here is how to handle the challenges you are likely to face.
Preventing and Handling Tangles
Tangles are the biggest frustration in kite fishing, but most are preventable. The key is to always maintain tension on all lines during deployment and retrieval. A slack line is a magnet for trouble. A proper kite bait rigging setup, with leaders neatly wrapped and gear organized, is your first line of defense. If a tangle does occur, stay calm. Have one person manage the kite while another works on the fishing lines. Trying to rush the fix almost always makes it worse.
Correcting Kite Flight Issues
A kite that is not flying correctly is not fishing. If your kite is diving in gusts, you have too much surface area for the wind. Let out more kite line to find cleaner air higher up, or switch to your heavy-wind kite. If the kite struggles to stay airborne in light wind, it is too heavy. Switch to an ultralight model. Sometimes, a simple adjustment to the kite’s bridle is all that is needed to get it flying straight and stable.
Adjusting to Changing Wind and Current
Kite fishing is not a set-it-and-forget-it technique. You must constantly monitor your baits and adjust to the conditions. If you notice a bait is skipping across the surface, it needs more weight. Add a larger egg sinker or pinch on a small lead to the leader. If a bait is getting dragged under by a strong current, it has too much weight. Switch to a lighter sinker. The captain also plays a huge role here, adjusting the boat’s drift to keep the baits in the optimal position relative to the wind and structure.
Reacting to a Missed Strike
It happens. A sailfish comes in hot, bills the bait, but fails to connect with the hook. Do not panic. The moment you realize the fish missed, reel up the slack quickly. Often, the bait is still on the hook and just stunned. Let it sit for a moment. If it starts swimming again, you are back in the game. If the fish stole the bait or it is damaged, reel in, re-bait as fast as you can, and get it right back into the strike zone. Often, the fish is still nearby and will hit the fresh offering immediately.